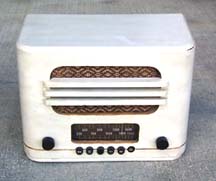
 This Westinghouse radio was an e-Bay purchase. I put in a low bid (I think it
was $12), and I got the radio for that price. I knew there would be a lot
of work involved, because obviously the radio had been painted! The description
did say that the radio worked, but it also said that it was an Emerson.
This Westinghouse radio was an e-Bay purchase. I put in a low bid (I think it
was $12), and I got the radio for that price. I knew there would be a lot
of work involved, because obviously the radio had been painted! The description
did say that the radio worked, but it also said that it was an Emerson.
When I received it, the bottom of the case had separated from the sides and there was some damage to the veneer strip on the bottom. It was pretty apparent that the radio had been dropped in shipping. I went ahead and tried it, and to my delight it worked fine! It was at this point that I realized the radio was a Westinghouse, and was able to find two pictures in Stein's Machine Age to Jet Age series to work from in the restoration.
Cabinet Restoration
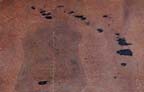
The first step in restoring this radio was to fix the cabinet damage. I carefully glued the cabinet back together, repairing the damage incurred in shipping (darn UPS goons!). Once the damage was fixed, the next step was to strip the radio. The radio had been painted white, with gold trim. It actually looked pretty good, but I wanted the radio to be as authentic as possible. I used Citri-Strip to take the majority of the paint off, and then also used Parks refinisher to clean up the wood even more.

|
|
|
The mahogany strip was replaced with a piece of mahogany veneer purchased in a roll from the local Menard's. Luckily, the width was identical so no trimming was needed. However, at this point, I did have to re-cut the bottom halves of the pushbutton holes. I cut the veneer with an x-acto knife, then sanded to get a smooth hole.
|
|
|

|
|
|
Electronic Restoration
The radio did work as found, so no electronic restoration was needed.