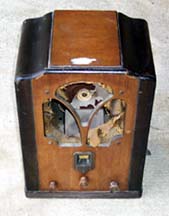
 This Westinghouse, the infamous "Columnettee", needs a new speaker cone
and grillecloth. While that part of the radio looks awful, the plus
side is that the case is in excellent condition, and will not need to
be refinished. There is a white price tag on the top that needs to be
removed, and some loose veneer which just needs to be glued back down.
I'll get to that soon enough!
This Westinghouse, the infamous "Columnettee", needs a new speaker cone
and grillecloth. While that part of the radio looks awful, the plus
side is that the case is in excellent condition, and will not need to
be refinished. There is a white price tag on the top that needs to be
removed, and some loose veneer which just needs to be glued back down.
I'll get to that soon enough!
Electronically, I have not tested the radio as of yet.
Cabinet Restoration
|
|
|
|
|
new cloth installation |
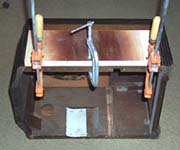
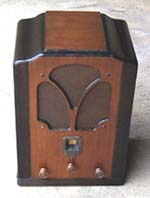
Once the veneer on the case was nice and tight, I coated both the brown and dark brown areas with light coats of stain to mask any scratches and cover up imperfections. The case does have some scratching, but I would be hesistant to refinish it based solely on that. The scratches are just not that bad. Once that was done, the case really began to look good. The next step was the grillcloth. I removed the old cardboard form, and examined the cloth. Fortunately, an exact replacement was available. Once I had that in, I created a new cardboard form for it from a tracing of the old one. I cut the form to size, then sprayed it with 3M adhesive. I then ironed out the grillecloth with some starch, sprayed it with adhesive, and applied it to the cardboard. You need to be careful with this stuff, because it sticks FAST - make sure that the cloth is aligned properly. I then tugged and pulled it abit to make sure it was tight. I had lightly spritzed it with water ahead of time, so I knew the cloth would tighten a bit as it shrunk down.
|
|
|
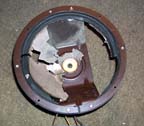
The next step is to re-cone the speaker (shown at right) and take a closer look at the electronics. That might wait awhile...