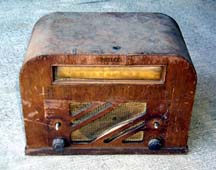
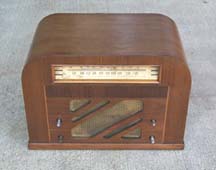
 Wow, have you ever seen anything so dreadful looking? I picked up this old Philco for
$10. The finish is trashed, there are two knobs missing, the veneer is separating (but it's
all there), and it's REALLY dirty. It was actually sitting in a puddle of water when I
found it at a junk shop. Looks like a fun project, eh? It might wait awhile, but it has
serious potential. And for $10...well, who could pass it up?
Wow, have you ever seen anything so dreadful looking? I picked up this old Philco for
$10. The finish is trashed, there are two knobs missing, the veneer is separating (but it's
all there), and it's REALLY dirty. It was actually sitting in a puddle of water when I
found it at a junk shop. Looks like a fun project, eh? It might wait awhile, but it has
serious potential. And for $10...well, who could pass it up?
Electronically, the cord is cut on the radio, so I have been unable to test it out.
Cabinet Restoration
|
|
|
|
|
|
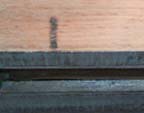
I went ahead and removed the veneer from the top of the radio. This turned out to actually be pretty easy. Some of the edges were already loose, and so I was able to get a putty knife under the veneer, which I used to peel it off. I used a sharp X-acto knife blade in other areas to strip the veneer off. I got some good sized chunks off, which might be useful in other restoration projects! Once the veneer was off, I did a quick rub down with some sandpaper to smooth out any bumps on the surface, and then got ready to apply the contact cement. In other projects, I have used stick-on veneer almost exclusively, but the local store was having a special on the paper-backed stuff, so I bought some. I cut a piece to size, and ironed it somewhat to make it lay flat. I then applied a liberal coat of contact cement to both the veneer and the cabinet.
|
|
|
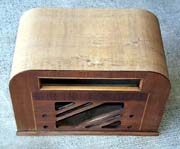
After waiting about 15 minutes I applied the veneer to the cabinet. You have to be very careful doing this, because once you press the veneer to the cabinet, the contact cement takes hold and you can't move the veneer. I started at the top, with everything lined up, and then smoothed the veneer down one side, and then another. The photo the right shows the cabinet with the new veneer attached.
|
|
|
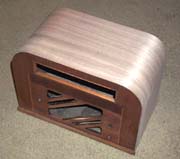
Next, I stained the new veneer to match the wood on the front of the radio. I used both a reddish and a brown tinged stain to try and get the perfect match. Alas, when I looked at the radio later, in a good light, I realized that it was much too red. What next? I thought I would have to start over...but I decided to try a stripper on it. Much to my delight, Parks refinisher took the stain right out, leaving just the original walnut again. I stained it a second time, and now the color is much better. The final step was to clear lacquer the radio, which was done in several coats with a fine #0000 steel wool in between. The photo on the left shows the radio as it is now. I still have the original grille cloth in, because I can't find an exact replacement. Also, I am lacking the 4 knobs (though I have a source). I'll also need to order some decals to place on the case in the appropriate places. Once that is done, the case of the radio should be complete!
Electronic Restoration
Nothing much to report here, yet. The radio has a cut cord. I'll finish the case before tackling the electronics!